| StarMax Power Plugs | Removing and cleaning the air intake fan | Links | Motherboard In the Case | Motherboard out of the case |
| StarMax |
|
|
| Removing and cleaning the air intake fan |
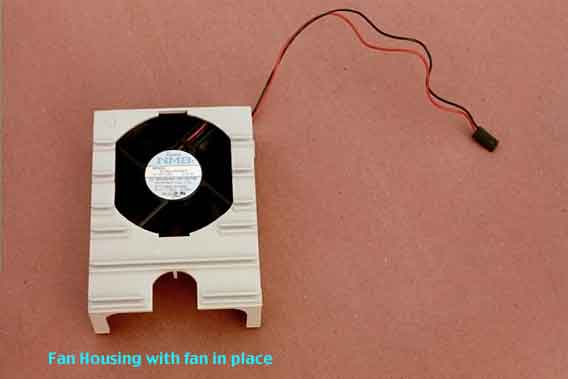
Most of our StarMax's have been in use for two or more years. Every Two years it is a good idea to remove the intake fan, clean the blades, and clean the air intake grille. To remove the front cover stand facing the front of the upright computer, press the front panel to the right about 1/2 inch and it will come free. 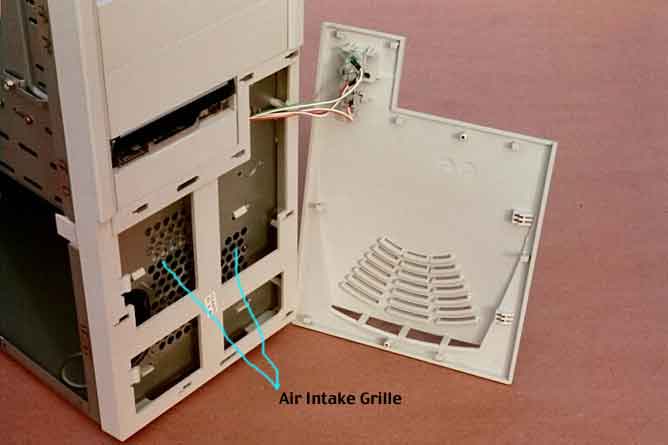 The photo above is a StarMax 3000/200 Minitower with the front cover opened to show the air intake grille from the outside. The fan is attached to the other side of this grille (See the lower photo on the StarMax Power Plugs page to see the location on the inside of the case). Vacuum all the accumulated dust and dirft out of the holes in this grille to be sure air can pass freely through to the fan. |
The photo above shows the fan housing removed from the StarMax case. See the description below for removal instructions.
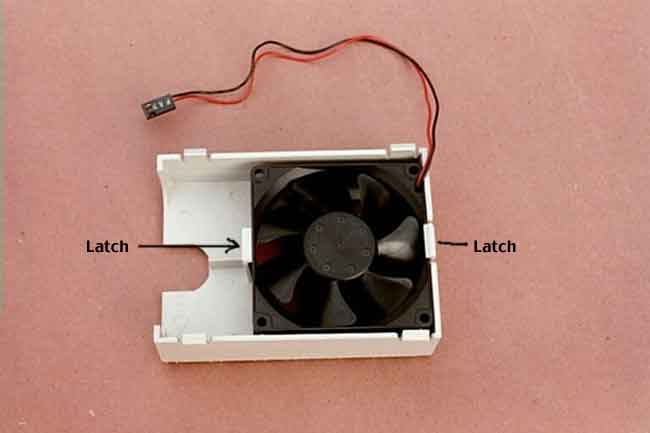
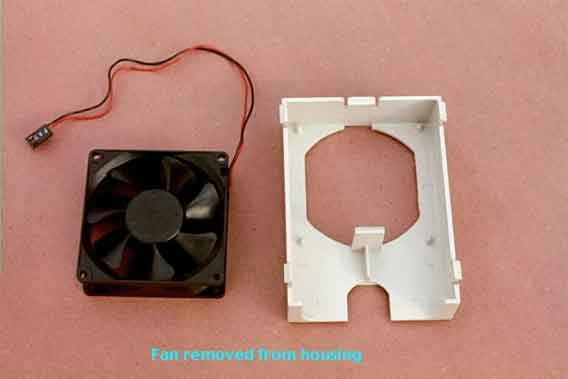
The photo above shows the fan housing from the other side so you can see the two white latches that hold the fan in the housing. The photo below shows the fan removed from the housing.
|
Written Instructions: Take the main cover off your StarMax by removing the four screws in the rear and sliding the cover up slightly and back until it comes free. Stand in front of your StarMax with the Max upright. Grasp the front lower panel with both hands, and press it to the right. It will slide to the right about 1/2 inch then come off. Take it off carefully because it has wires attached to it. If the LED should pull out just push it back in. Stand this panel to the side so as not to put too much stress on the wires. Now look at the plastic fan housing inside the computer at the lower front. Observe where the wires come out and which way the fan is oriented so you can get it back correctly. Note also that it fits around the speaker but that the speaker does not come out with the fan housing. However, be careful of the speaker wires. OK, as always, you should have an antistatic wrist strap on and grounded. Grasp the plastic fan housing with your left hand and squeeze the front of it together so that the 4 plastic latches that hold it to the grille unhook. Carefully remove the entire housing, taking care with the wires. (I like to cut the little plastic tie so I can separate the wires and remove the fan housing completely from the computer but this is not absolutely necessary). Lay the fan housing face down and note there are two plastic latches that hold the fan in the housing. Press these latches outward and remove the fan, taking care to note where the wire goes and which way the fan is oriented. Now the fan blade can be cleaned with a soft cloth and "Q" tips. Vacuum the dust from the motherboard in front of the fan with a PLASTIC vacuum cleaner attachment. Vacuum the air entry grille and inside the front panel. Be aware of the need to avoid static electricity. Reassemble the fan in reverse order, being sure to get the wires back correctly. The fan housing will not seat against the grille if the wires are pinched between the housing and the grille instead of being threaded through the slot.  |